- today
- label Linear Drains
- favorite 1 likes
- remove_red_eye 1562 views

Draining your home’s plumbing may seem daunting, but it doesn’t have to be. With simple preparation and the right technique, you can drain your pipes to prevent freezing or make plumbing repairs.
This guide will walk you through the step-by-step process to safely and effectively drain your plumbing system without damaging your wetroom or other areas of your home.
Why Would You Want to Drain Your Plumbing System?
There are several reasons why you might need to drain your home's plumbing:
-
Renovations: If you're planning a bathroom refurbishment, draining the water system allows you to work on the pipes and fittings without any surprise spurts.
-
Winter Proofing: If you're leaving your property unoccupied for an extended period during winter, particularly in areas prone to freezing temperatures, draining the pipes helps prevent them from bursting due to ice expansion.
-
Making repairs: Sometimes, isolating a leak for repair or fixing a water hammer problem requires shutting off the water and draining the relevant section of pipe.
-
Replacing fixtures: Installing a new shower valve or shut off valve often involves draining the water to disconnect the old unit.
Step-by-Step Guide to Draining a Plumbing System
With the basics out of the way, here are the steps involved in draining your system:
1. Locate and Turn Off the Main Water Valve
This valve controls the supply of water entering your entire home. It's usually situated near the water metre, often in a utility room or under the kitchen sink. The main water valve typically has a handle or lever. Turn it clockwise (usually a quarter turn) until it stops, shutting off the water flow.
2. Open the Valves and Drain Cocks
With the main water supply off, you now need to open up all the drain valves in your home to allow the remaining water in the pipes to drain out. Start by locating and opening any drain valves or drain cocks on the water supply system itself and boiler. These are typically located at the lowest level in your home, like the basement.
3. Drain the Water Heater
Turn off the power supply to your water heater by switching off the circuit breaker or unplugging the unit. Then, locate the drain valve at the bottom of the water heater tank and open it to allow the water to drain out. This step is important to prevent any remaining water from freezing and causing damage to the water heater.
4. Open All the Hot and Cold Taps
Work methodically through your house, opening all the taps, including hot and cold taps in sinks, baths, showers, and the laundry tub. Start from the highest floor and work your way down, allowing gravity to assist the water flow. Don't forget any outdoor taps or hose bibs as well. This allows air into the system and drains any remaining water from the pipes.
It’s helpful to have some buckets or towels handy to soak up all the water coming out as you open each tap. Be prepared for a steady flow of water at first before it slows to a trickle.
5. Drain the Toilets
Flush each toilet to drain the water from the cistern. You can also hold down the flush lever to remove any remaining water in the bowl.
6. Drain Appliances
If you have any appliances connected to the water supply, such as a washing machine or dishwasher, consult the appliance manual for specific instructions on draining them. In some cases, a dedicated drain valve might be present.
7. Drain Traps (Optional)
Traps are U-shaped bends in the pipes that hold a small amount of standing water to prevent sewer gases from entering your home. If you need to remove all remaining water from the system, you might need to access and drain the traps using an adjustable wrench or pliers.
Be prepared for some residual water to spill out, so have a bucket and towels handy. Some traps might be difficult to access and require the help of a plumber.
8. Wait for the Entire System to Drain
Leave the taps open for a while to drain the remaining water in the system. You might hear gurgling noises as air enters the system, which is perfectly normal. Depending on your plumbing system's size, the draining process can take several minutes to an hour or more.
9. Check Pipes and Connections for Leaks
Do a quick visual inspection around all the taps, pipes, and connections for any leaks. Address them immediately before you allow the system to fill again.
Refilling Your Home's Plumbing System
Once you've completed the draining process and finished your renovations, repairs, or winter preparations, it's time to get the water flowing again. Follow this basic process:
1. Close the Taps and Drain Valves
Start by closing all the taps you previously opened, working your way from the bottom floor upwards. Next, close all the drain valves. This will prevent water from escaping the system as you refill it.
2. Open the Main Valve
Slowly turn the main water valve anti-clockwise to allow water to re-enter the system. You might hear a hissing sound as air escapes the pipes.
3. Air Out the System
Open one tap at a time, starting from the highest floor. Soon, you’ll have safely restored full water pressure. There might be some sputtering and air bubbles initially. However, if the air persists after running the tap for a prolonged period, it could indicate a leak that a plumber would need to fix.
Wetroomstop: Quality Supplies for Perfect Wet Room Drainage
A wet room with quality drainage minimises the need for frequent draining of your entire plumbing system. At Wetroomstop, we provide all the high-quality, durable supplies needed for a stylish and functional space that’s built to last.
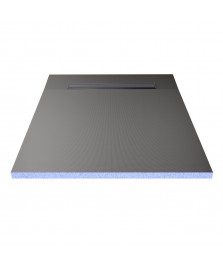
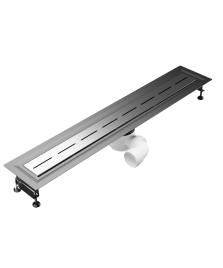
Our range of level access wet room shower trays integrates seamlessly into your wet room floor. Then, choose from various sleek linear drains to complement your design while efficiently removing water.
Browse our range today or contact our helpful team for product recommendations, installation advice, and drainage guidance.


