- today
- label Wet Room Kits
- favorite 0 likes
- remove_red_eye 2180 views

A beautifully fitted shower tray is the foundation of a luxurious and functional shower. Whether you're renovating your entire bathroom, designing your dream wet room, or simply replacing an older, outdated shower tray, getting the installation right is crucial. Incorrect fitting can lead to frustrating leaks or even water damage.
Fortunately, if you have the correct supplies and the know-how, achieving a well-fitting, professional-grade shower tray is within reach
Preparation for the Installation Process
Start by gathering these essential materials for your shower tray fitting:
- Shower tray: Select a shower tray that suits your desired size, style, and floor type (tiled or vinyl). Wet rooms and walk-in showers usually require low-profile shower trays. Check the manufacturer's instructions for any additional materials they recommend.
- Shower enclosure: Choose a shower enclosure (if applicable) that's compatible with your shower tray.
- Shower tray waste: Ensure the waste is compatible with your shower tray dimensions and your existing pipework.
- Drain/Waste pipe: You may need to extend or modify existing waste pipes to connect to the new shower tray waste.
- Mortar (for solid floors): Choose suitable bonding or levelling mortar.
- Spirit level: This is essential for ensuring your tray is completely level.
- Silicone sealant: This is used to seal gaps in the shower tray so it's watertight.
- Pencil: To take measurements and make any helpful markings during the fitting.
- Tools: These include a screwdriver, tape measure, and potentially a jigsaw if adjustments are needed
At this point, it's also a good idea to consider whether you need a riser kit. This kit elevates the tray to adjust to unusual plumbing layouts or give extra clearance.
Step-by-Step Guide to Installing a Shower Tray
1. Plan Your Layout and Check for Issues
Before you begin, decide where you want to install your new shower tray. Check that any existing pipework is compatible and that you have the appropriate waste and trap. If the floor is uneven, you may need to address this before proceeding.
2. Position and Outline the Shower Tray
Loosely place the tray where you intend to fit it. Check for any fitment or clearance issues with your planned enclosure. Use a pencil to outline the shower tray's base.
3. Prepare the Floor
For Solid Floors
Remove any old tiles or flooring in the shower area. If the floor beneath isn't level, you'll need to adjust it before proceeding.
For Wooden Floors
You may need to reinforce the floorboards next to the tray to support the weight. Consider replacing sections with marine plywood where needed for extra strength.Underboarding will be required if you are looking to lay the tray directly onto joists.
4. Trial Fit the Waste
Position the shower tray waste in its hole temporarily. To ensure a good fit, you may need to extend or modify your existing waste pipe.
5. Create the Mortar Base (for solid floors)
Mix up some mortar, typically building sand and cement, in a ratio of around 5 parts sand to 1 part cement. It should have a dense consistency. Spread the mortar mix evenly within the outlined area for your shower tray.
6. Fit the Shower Tray
Carefully position the shower tray onto the mortar bed. Double-check that the tray is completely level with a spirit level. It's helpful to have someone on hand to assist at this stage.
7. Connect the Waste Trap
Once the shower tray is set, attach the shower trap and connect it to the trap and waste outlet pipe. Perform a water test on the drain and waste trap to check for leaks.
8. Seal and Finish
Allow the mortar to dry completely. Then, apply a bead of silicone sealant around the shower tray edges where it meets the wall and floor using a sealant gun.
9. Waterproofing.
Proceed to doing a layer of waterproofing on the tray and surrounding floor and walls. Be sure to follow the installation instructions of the waterproofing method you choose to ensure the waterproofing is done correctly.
10. Floor finishing.
Once the waterproofing is finished and set according to the manufacturer's instructions. You can proceed to installing your floor finishing material.
Important Considerations When Fitting a Shower Tray
- Unusual configurations: If you have a particularly tricky bathroom layout, a height-adjustable shower tray may be your best bet. Look for one with a range of adjustments to easily adapt to your unique space.
- Waterproof your shower area: If you're installing a shower outside of an existing enclosure, make sure your bathroom is properly waterproofed to prevent water damage.
- Follow the manufacturer's instructions: Each shower tray may come with specific installation guidance, so ensure you carefully review these instructions
Explore Wetroomstop's Range of Shower Trays and Supplies
By following these expert tips and taking your time, you can confidently carry out a perfect shower tray fitting. Remember, a well-fitted shower tray will prevent long-term problems and give you a beautiful shower to enjoy for years to come.
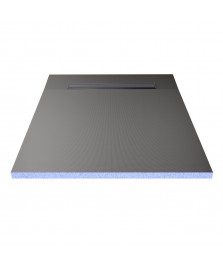
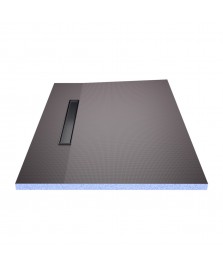
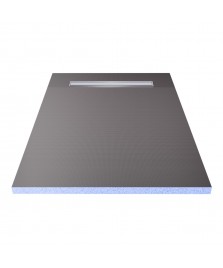
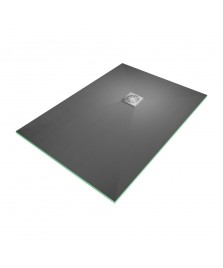
At Wetroomstop, we understand the importance of a reliable and expertly fitted shower tray. That's why we offer a range of shower trays suitable for both tiled and vinyl floors. Our shower trays come in various shapes and sizes to fit diverse bathroom layouts. They're built from durable XPS foam, reinforced with fibreglass mesh, and finished with a flexible cement coating to ensure both strength and longevity.
Upgrade your bathroom experience today by exploring our range of high-quality shower trays and wet room supplies. Feel free to contact our expert team for product recommendations and installation guidance tailored to your specific project.


